Aren't yard sales a lot of fun! You can get rid of your unused goods, while making a little cash at the same time! I held my very own for the first time Saturday! (April 26th) When looking around the house to find something to put money in, my fiance suggests I MAKE something to hold it in! Isn't he just lovely ;) So, how would you like to learn how I made this?? (My first paper tutorial, and it's an advanced one, sheesh, I know. But I really wanted to share this with you :)
Now, I'm the only one of my friends who does Box crafting. All of my Paper crafting friends do Scrap booking and Card making. And that is wonderful to me :) I've made the directions as 'diverse' as I can! For all crafters alike! So grab a ruler, a mechanical pencil, your favorite X-acto knife, and come with me!
First things first. Be sure to spend 30 minutes to an hour writing the template for this box. Luckily for you, I've done that for you :)
Next! Pick out your favorite piece of 12x12 Cardstock. Paper works, but Cardstock is best for boxes.
Since I do not need two, I chose this for a friend of mine to give to her.
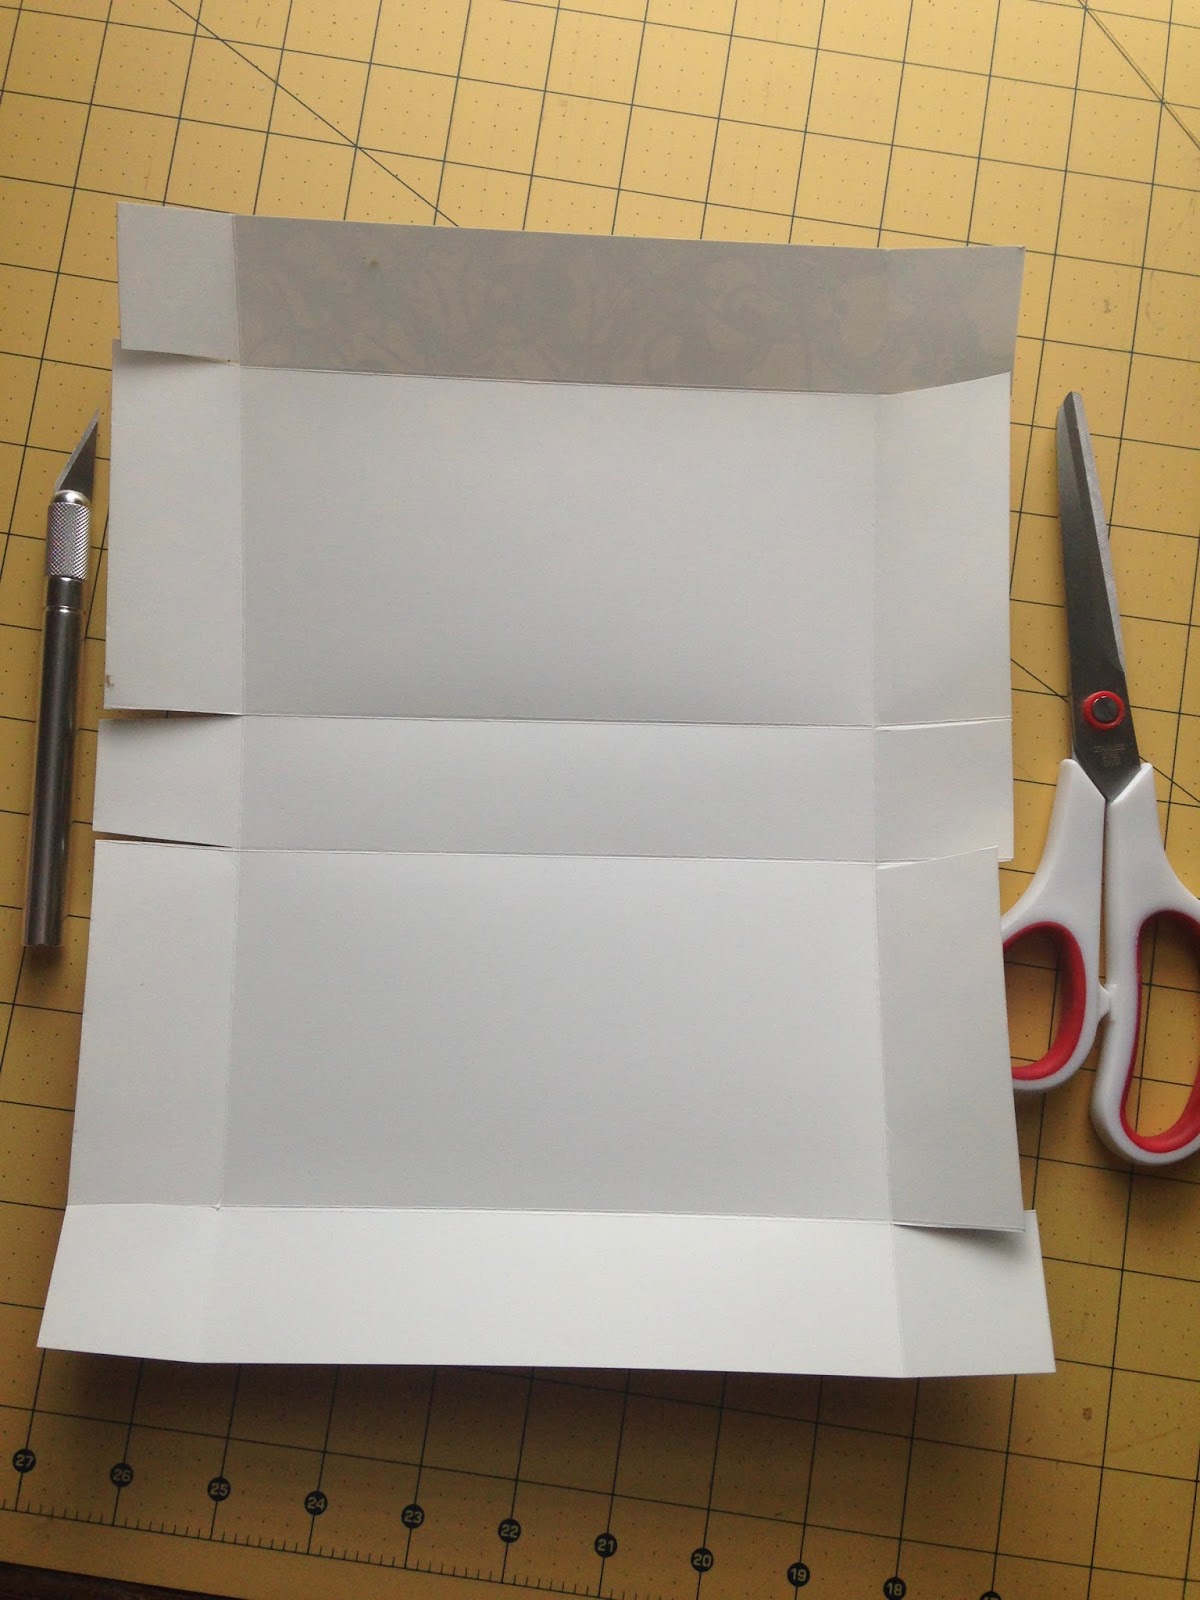
Using your favorite method of either a X-Acto knife or Paper trimmer, cut 2inches off, to make the paper now 12x10
If you are a paper crafter, you probably already have a scoreboard or a scoring blade on your trimmer. If not, A ruler and an EMPTY mechanical pencil work just fine. We are making indentions in the paper so it folds perfectly straight.
'Score' the paper 1 1/2 inches from the edges from the short ends. ( Score at 1 1/2 inches and 8 1/2 inches)
Then turn the paper long ways and Score at: 1 1/2 , 5 1/4, 6 3/4, and 10 1/2. This is the difficult part for people who are not avid paper crafters. It can still be done, it's just not as easy with our 'tools' :)
After you have successfully indented your paper with lines, fold along all of your lines and see if your rectangle looks like mine now.
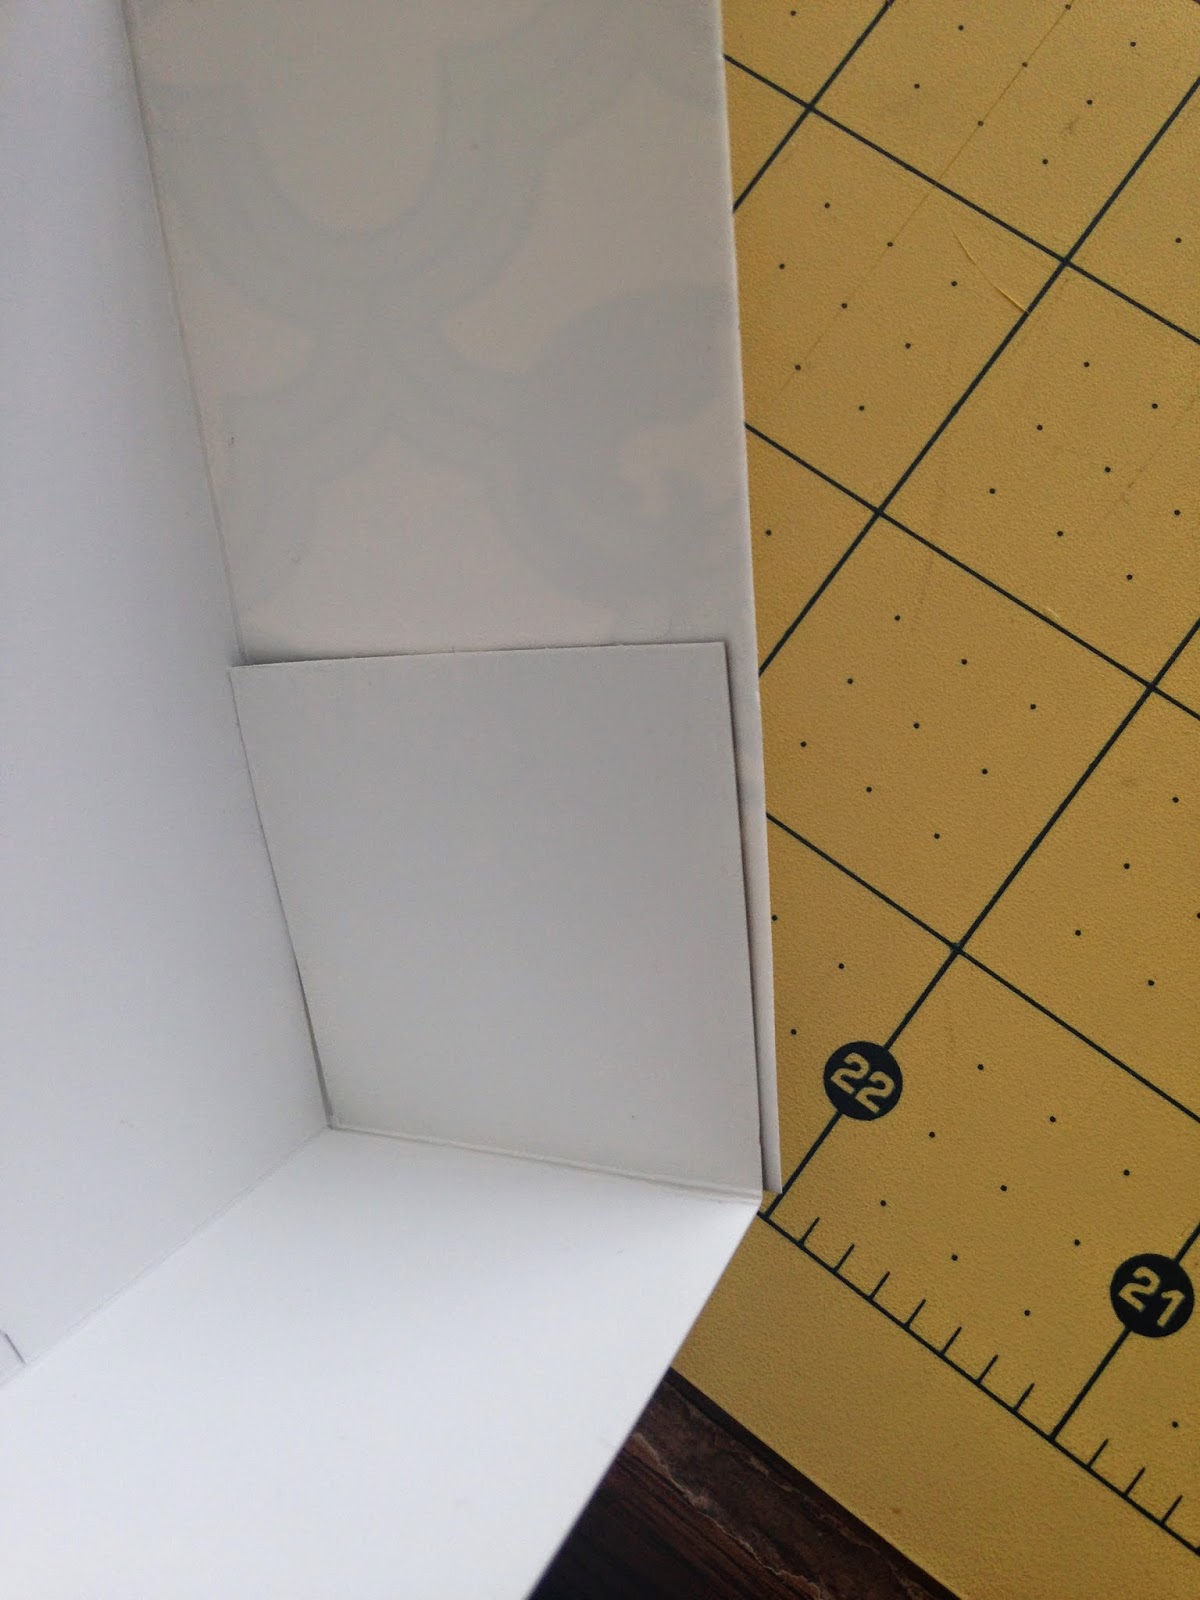
Next find your scissors and cut between the squares and rectangles on the sides. Nothing should detach from doing this.
OPTIONAL! Cut notches on those slots. Less then quarter of an inch will do. This is so when we connect them , the sides will less likely stick out. But that can also easily be trimmed later.
Next! Choose your favorite adhesive. I use both. I use a little double sided tape (Snail tape) to hold it while the glue dries. Snail will not hold it for long by itself, so it's best to use glue if you have it.
Put glue on the pattern side of the squares. Not the rectangles! Then adhear them to the rectangle next to them.
This is where Those notches came in handy, see how the square is lower and not sticking up last the corner?
After you have done the left and right sides you will see your box forming! Take the time now to decide which side will be the top. Once you have decided, glue the rectangles to the bottom of the box. (It doesn't actually matter if you chose the top or bottom, I just think it looks neater.) What is this?? A box has formed!! How neat :) If you want. You can be done now. OR!
You can use your Oval punch to make a half circle (I have 4 punches, and this is one of them) OR you can draw it by pencil and then use your X-Acto knife. This will help open it.
OR! You can also put a divider in it. You will need a scrap piece of paper (Computer paper works too) Make sure it is 3 inches in widtch. The length will be the length of your box minus a tiny pinch so it will fit. About 1/8th or 1/16th of an inch.
I folded it in half and then 1/4 inch from the sides. I put some tape in the middle to hold it together.
You should have a little up-side down T. You could also make 2 of these, and then cut one up to make Nickel Dimes and penny holders, but no one like tiny change at yard sales, so I just used one.
I used a quarter to help decide where to put the divider. I used a pencil to make the mark to remember where it went when I took the quarter out.
Now it's done!! All that is left to do is decorate! (Which I am actually bad at haha) I pulled a few different ribbons and stickers out that matched it, then put what didn't match away.
Int he end, this is what I cam up with. If I could redo this, I would go with the Blue/Aqua ribbon and put her name on the ribbon like I did mine. But the letters were gold so I didn't want to put them on it. And I didn't want to use the blue ribbon because I wanted a contrasting color.
Surprise! This box is for my sister! I will work on an easier box for beginner, this is just what I have been up to recently! Hope you enjoyed! Share this with all of your paper crafting friends!


No comments:
Post a Comment