Friday, March 23, 2018

Easter Bunny Silhouette


I've seen this craft floating around on Pinterest for a while, so I thought with Easter around the corner, I would give it a try. It was REALLY fun, and SUPER easy!! No fancy paper crafting tools!

What you'll need:

  • At home printer
  • Google Image Bunny/Egg Silhouette x2
  • Glue/double sided tape
  • Xxacto Knife/ Scissors
  • Scrap paper strips/bought 
  • Empty Frame
  • Cardstock


An empty frame I found in my bedroom closet! Score!


Print two copies of the silhouettes. I highly recommend using cardstock!
I have a picture of what happens if you use regular computer paper at the end of this tutorial.
On ONE of the copies, use scissors or Xxacto knife to cut out the inside out. 


Be sure to cut AROUND the printed lines. They will show up in the end. 


Layout your scrap paper to see what order you'd like the colors to be in. 


You can even put the cut out on top to see if you like the combinations or not. 


Cut your scrap paper into how ever wide you want your strips. 
These are 3/4 of an inch, though I later changed it to 1/2 an inch. 


I used a ruler to make sure each strip was on even, as I laid them down. 
Using the double sided tape I laid each strip down, making sure the strip covers the bunny. 


You don't have to lay your strips even like this, I just happen to cut them the same length. 
As long as the bunny is covered, that's all that matters. 


I put double sided tape on the BACK of the cut out rabbit. 
Making sure to put it around the inside of the cut out. 


Because the rabbits are the same size, I can put the cut out rabbit on top of the paper and it will line up! Also. This is what happens when you only use computer paper. You can see the strips of paper! 


Even when I put it in the frame, you could still see the long strips through the rabbit. 
So, I redid it with cardstock, and it turned out MUCH better! 


Ta-Da! You did it!! How cute is that??
I hope you decide to try this craft! It was super fun!! 
Show me a picture of your project on my FB page!
I'm always around for trouble shooting too!


I post Food blogs every Monday and Craft Blogs every Friday!! 

Friday, March 2, 2018

Paper Rosettes!


I recently came across an email as inspiration for today's blog!
Shutterfly didn't even realize what an inspiration they would be! 


As soon as I saw the email I thought "I haven't made those in forever!!" And knew they would be on my next Crafty Friday Blog. I learned some new things while making these, so learn from my mistakes, and I hope you make tons of these on your own!! 

This tutorial shows you how to make many different sizes!! 

Supplies:

  • 12x12 paper (Cardstock works best for this! But paper CAN work) 
  • Regular glue/ double sided tape
  • Glue gun
  • Decoration/ Embellishments
  • Scoring tool ( See my previous BLOG for great scoring tool ideas! ) 
  • In the tutorial I'm going to be using Ol' Trusty for my scoring needs. 
  • I also just use a cheap Fiskars Paper Trimmer for my cutting needs. 


Using your favorite method of cutting paper, cut your 12x12 paper into 4 even strips.
(That's 3" each)
You should now have 4 strips of paper that measure 3" x 12"
Though, for this first rosette, we will only be using TWO of them. 


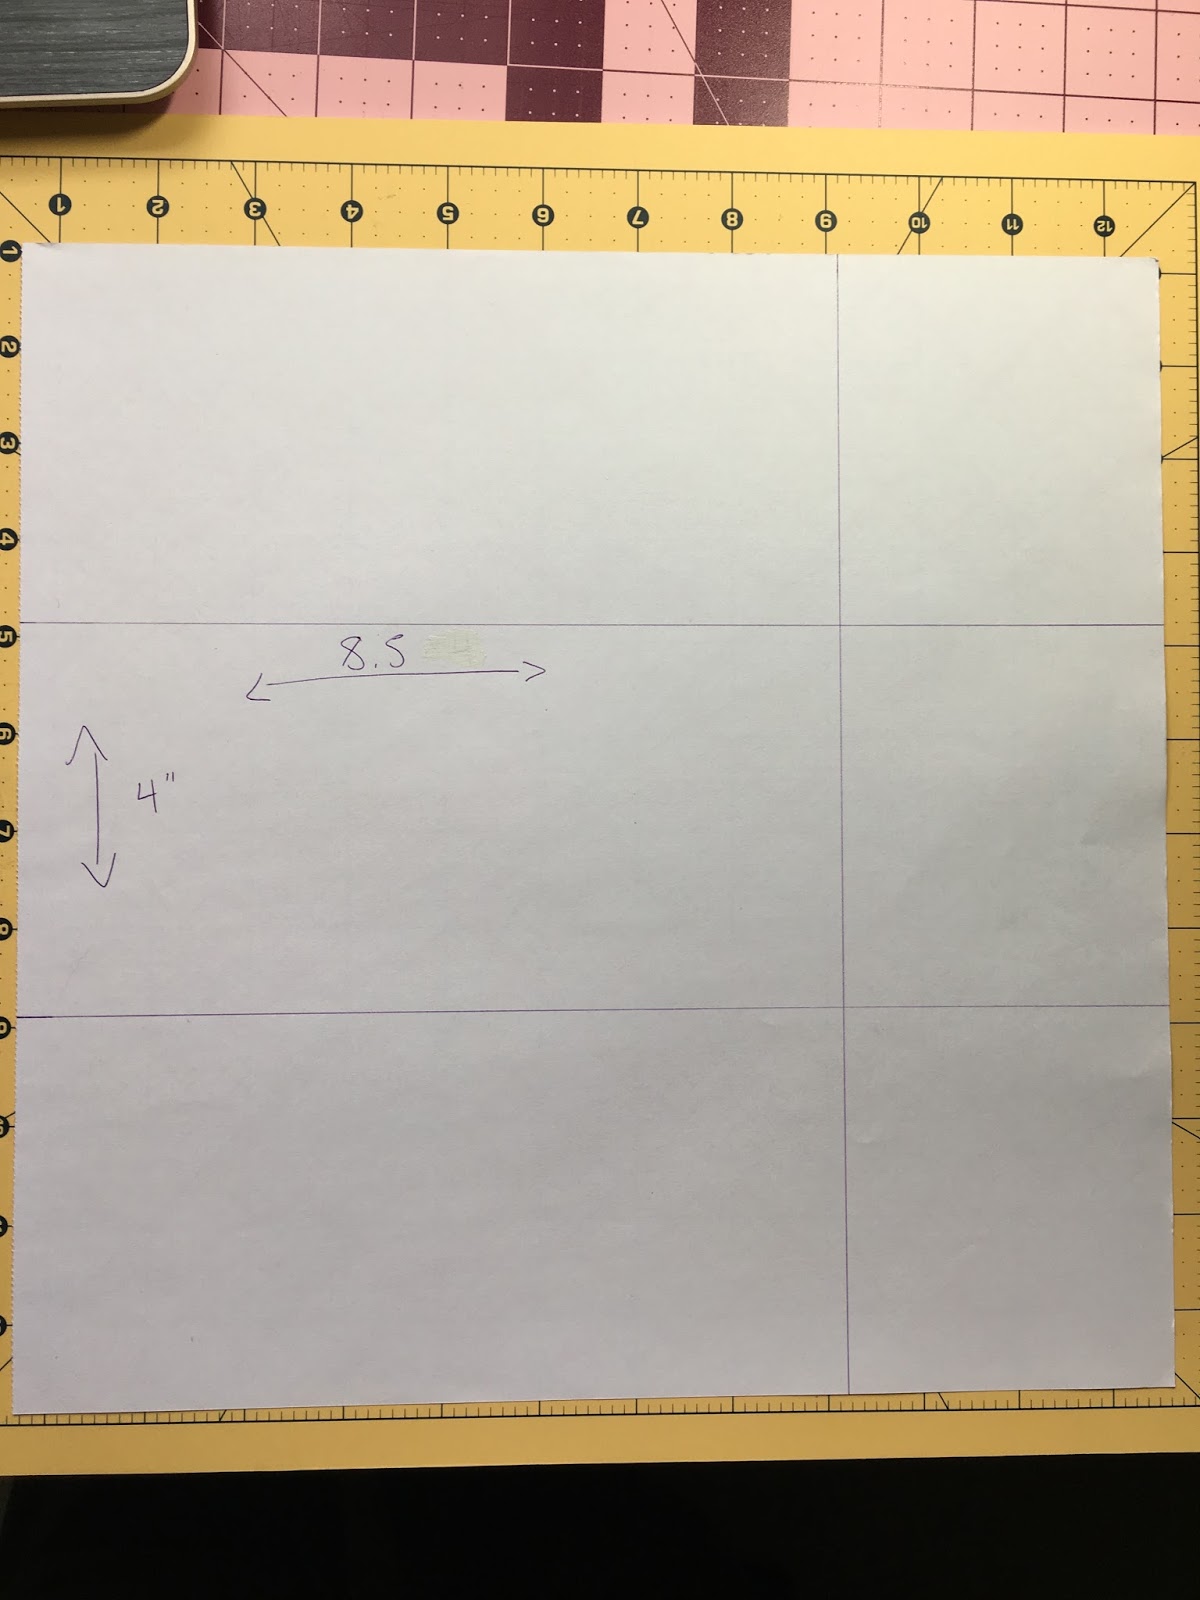
Next, we need to score the strips of paper in half inch increments. I'll show you what it looks like if you score them on the 1/4" line too, later. 


This is showing you to score them on the shorter side of the paper.
This picture is also showing you that I turned my score board on it's side for comfort. 
 

After you score at least two of them, start folding them back and forth accordion style.
This part takes the longest, I feel.
Though, I do think this part was easier with cardstock than with regular/ lightweight paper. 


You'll need to fold them in opposite directions. See how the one on the left, at the ends, the last flaps are pointed down? And the one on the right, the last flaps, are pointed up? This will make for a cleaner finish. If you didn't do it this way, just cut the last flap off on each side of one of them. 


That step is important because now we are going to connect them. 
I put double sided tape on the side with the red lines, and connected them together. 


If you used a glue that needs to dry, just get a paperclip or something to hold it together for a minute. 


Next bring the last two end together to make a complete loop.
Making it look sort of like a tank wheel. 


Now turn the wheel on it's side to make it look like a lamp shade. 


Gather the middle and press down, it should go down pretty easily! 


Look! It's "basically" done! 
Don't worry if it doesn't want to stay in that shape. Just place something on top of it until we get our glue and circle ready. 


I made a 2" circle out of an index card. 
You will need one for the back and one for the front.
The front circle doesn't have to be 2" because it will be seen. 


I'm using hot glue for this one because it dries faster.
I recommend only using a school glue if you are making smaller ones. 


I placed a plastic paperclip jar on top to help it stay down while everything dried. 


Ta-Da!! You did it!!
Using two of the 3"x 12" strips will get you this 7x7 circle. 


So, what would happen if we had scored it on the 1/4" lines earlier?
First of all, they take forever to fold, haha. 


Second, I had to cut the 3" strip in half (1.5" strip now)
To make it long enough to go around.
But look at the middle of that. The middle circle is huge!


We fix that by cutting out some of the length on the strip.
Then just reattach it like nothing happened. 


I could have taken more length off to get a tighter middle, but I decided this was fine. 


The giant pink rosette, is the size you get when you connect all four of the strips together.
The top circle on the pink one looks crazy because I used A LOT of regular school glue.
The large pink one was made with one whole 12x12 sheet of paper.
The medium was made with half a sheet of 12x12.
The smallest was made with one fourth of a 12x12 piece of paper. 

And this was just the Basics of making a paper rosette!
Just by changing the length, and width of the paper you can get hundreds of different sizes! 


About 5-6 years ago, I made a bunch, and used them as a decoration to have on my first sewing machine. 
(Sorry, I don't have a picture of that part close up, it was a long tine ago!)

(Photo courtesy of CatchMyParty.com )

You can even use them to make a pinned corsage!
Let me know if that's something you would like to learn how to make!
I know how to make that style AND the all ribbon kind!

Let me know if you make anything from my blogs! I would love to see them!
Just post them on The Crafty Goose FB page!
I'm always available for trouble shooting as well :) 


Friday, February 23, 2018

Jelly Bean Treat Box! -Beginner


Want to give someone you love a little treat this Easter? (Or any occasion really!) I found the inspiration for these boxes through one of my favorite Youtubers! Watch her video HERE . She uses a few advanced tools, in her video, but nothing to abnormal for your avid paper crafter! I tried to break it down for someone doing paper crafting for the first time, just using basic crafting tools than can easily be interchanged! 

Tools for Beginners Needed:

  • 12 x 12 Paper or computer paper (Cardstock works best, but paper can pass) 
  • Scissors  
  • X- ACTO knife, OR Paper cutting tool Such as this
  • Ruler 
  • Blunt object such as a mechanical pencil with out lead, or an envelope opener
  • Double-sided tape (these are great) Or glue, but tape is best. 
  • Small treats to put inside
Optional:
  • Stamps and punches
  • Acetate or boxing tape
  • Brads , paper clips, or Mini clothes pins
  • Anything else you'd like to use for decoration!
In Short:
  • Something that cuts paper
  • Something that scores paper
  • Something that adheres paper
  • Decorations 


I used a 12 x 12 piece of paper, and was able to get 3 treat boxes. You'll get 2 boxes if you use regular computer paper size (8.5 x 11) 

(I used the 'beginner tools' on the demo to show it could be done! I used my 'advanced tools' to make the pink boxes more quickly, in the end.) 

Using your Xacto knife OR Paper trimmer, cut out rectangles of 4" x 8.5" 

ONE rectangle of 4" x 8.5" will make one box. The squares you see on the right are scrap, but you can use them to decorate your treat boxes in the end  if you like! 


Now we need to score the paper. Scoring just makes it so the paper will bend to our whim more easily. You want it to make an indention on the paper with out cutting through it. 
I usually use my Martha Stewart Score Board that I got 5 years ago. 
Also Most paper trimmers also come with a scoring blade on them. 
But if you have neither, this is where a ruler and blunt object come in handy. 
For demo sake, I used a ruler and letter opener. 
You'll want to make these lines an inch and a half from one side and half an inch from the other.
(Advanced paper crafter measurements on the bottom of the paper in the image) 


Turn the paper side-ways and score it every 2 inches. 
It's not SUPER important which side is up a this point. 
I put the skinny part on top for this demo, but it was on the bottom when I made it with the pink paper. 


This next part is optional. 
If you want to make your boxes a little 'crisper' or 'cleaner' Find the middle point of the 2nd and 3rd box and score a triangle in the boxes. 


The pink box on the left has the scored triangles, it looks crisp and clean.

I skipped this step for the box on the right. It looks fine from the front! 
Only you will notice, in the end. 


Scissors time! Cut along the red lines I have below.
Just a snip at the top so you wont see corners in the end product.
Cut the bottom right rectangle plus a little off the next one. 
And cut each of the bottom lines. 


You're paper should look like this! 
The top paper is the one I have been using for you to see more clearly. 
The bottom one is what yours should look like currently. 


Optional. 
Making a window for your box! 
Fold the 'skinny' part of the paper, and find a punch that clears the fold. 
The smiley face on the demo paper is the box you would put the window in. 
The punch I have here will not work because it will cut off part of the flap. 


I found a punch that worked! If you decided to put a window in, yours should look like this! 
Note: My punch did not go all the way through the paper (cheap punch). 
I ended up using my Xacto knife to finish the job. 
If you are up for the challenge, you can use only your Xacto knife to make the window! 


If you are afraid your candy will fall out of the window, you can use acetate or some packaging tape to make a clear window to attach. 


Time to form the box!!
Use your double-sided tape on the little flap we made on the right side. 
You 'll be putting the tape on the front side of the paper. 


From there you can just fold the paper in half to connect the tape to the left side of the paper. 


It should resemble a box now!!!
If you made a window, place that side of the box down. The flap on the bottom is the side we will put the tape/glue on. 
Fold the side flaps in first, then the top and the flap with the adhesive last. 


Basically done!! 
I took an ink pen and pressed the flaps down form the inside, to help the tape stick. 
Now you just need to fill it and close it!! 


I used little brads to close mine, but the options are endless! 
(This treat box was done with computer paper! It will be less sturdy for heavy candy, but great for practicing or light candy!) 


Get creative! There are so many option with this little guy!
Be sure to share yours with me if you decide to make one or a few!

I'm always available for trouble shooting! Just send me a message!